A video borescope is a versatile tool used for visual inspection in various industries such as automotive, aerospace, and manufacturing. Proper assembly of a video borescope is essential to ensure its functionality and reliability during inspections. In this article, we will provide a step-by-step guide on how to assemble a video borescope.
Step 1: Unboxing and Inspection
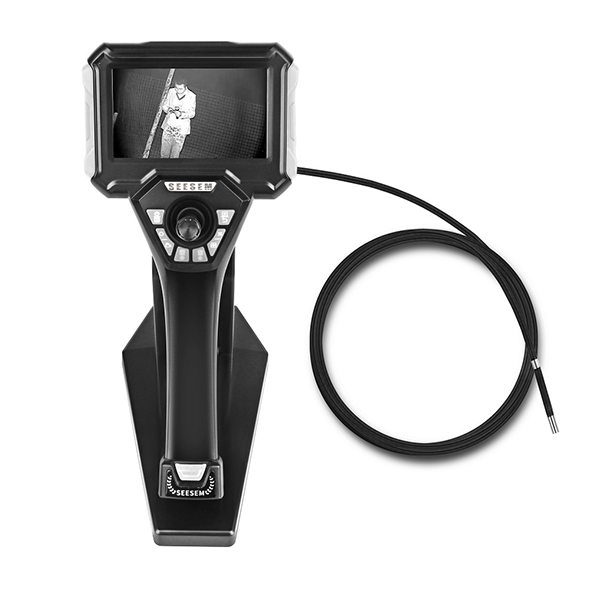
Begin by unboxing the video borescope package and carefully inspecting its contents. Ensure that all the necessary components are present, including the main unit, insertion tube, monitor, battery pack, and any additional accessories mentioned in the product documentation.
Step 2: Attaching the Insertion Tube
Locate the insertion tube, which is a flexible and slender cable with a camera at its tip. Align the connectors at the end of the insertion tube with the corresponding ports on the main unit. Gently push and twist the connectors until they lock securely into place.
Step 3: Connecting the Monitor
If your video borescope comes with a separate monitor, connect it to the main unit using the provided cable. Insert one end of the cable into the video output port on the main unit and the other end into the input port on the monitor. Ensure a firm connection is established.
Step 4: Powering the System
Depending on the model, your video borescope may use either built-in rechargeable batteries or replaceable batteries. Follow the instructions provided in the user manual to install or charge the batteries. Once the power source is ready, turn on the video borescope and monitor to verify functionality.
Step 5: Adjusting Display Settings
Many video borescopes offer adjustable display settings for optimal viewing. Familiarize yourself with the controls on the monitor and make necessary adjustments to brightness, contrast, and color balance to enhance the clarity of the inspection image.
Step 6: Testing the Articulation (if applicable)
If your video borescope has an articulating feature, which allows the camera tip to move in different directions, perform a test to ensure smooth articulation. Follow the instructions in the user manual to control the articulation and verify that it functions correctly.
Step 7: Exploring Additional Features (if applicable)
Some video borescopes may come with additional features such as image capture, video recording, or measurement capabilities. Take the time to familiarize yourself with these features and learn how to utilize them effectively for your inspection needs.
Conclusion:
Proper assembly of a video borescope is crucial to its performance and functionality during inspections. By following the step-by-step guide outlined in this article, you can ensure that all components are securely connected and the system is ready for use. Remember to refer to the user manual provided by the manufacturer for specific instructions and safety guidelines. With a properly assembled video borescope, you can conduct efficient and accurate visual inspections in various industries.