Installation Process of an Industrial Videoscope
Introduction: An industrial videoscope is a valuable tool used for visual inspection and diagnostics in various industrial applications. Its flexible probe and high-resolution camera enable engineers and technicians to access confined or hard-to-reach areas, making it an essential device for maintenance and quality control tasks. In this article, we will outline the step-by-step installation process of an industrial videoscope for seamless and effective operation.
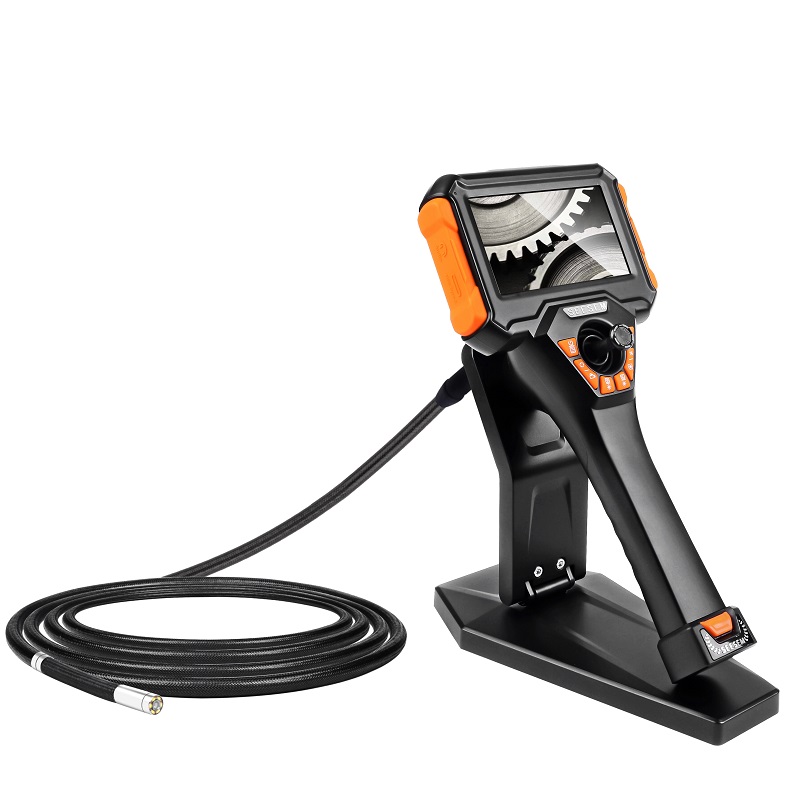
Step 1: Unboxing and Inspection Upon receiving the industrial videoscope, carefully unbox the package and inspect the contents. Ensure that all the components, including the videoscope unit, probe, monitor, battery, charging accessories, and user manual, are present and in good condition.
Step 2: Assemble the Videoscope Unit
- Attach the probe to the videoscope unit securely. Make sure the connectors are aligned correctly, and the locking mechanism is engaged.
Step 3: Powering Up the Videoscope
- Charge the videoscope unit and monitor using the provided charging accessories.
- Once fully charged, power on the videoscope unit and the monitor.
- Perform a quick functional test to ensure that the display and camera are working correctly.
Step 4: Adjusting Display Settings
- Adjust the brightness, contrast, and color balance settings on the monitor to achieve optimal image quality for the inspection environment.
Step 5: Calibrate the Videoscope
- Some industrial videoscopes come with calibration features to ensure accurate measurement readings. Follow the manufacturer’s instructions to calibrate the videoscope if required.
Step 6: Probe Articulation
- Test the probe articulation controls to ensure smooth and accurate movement of the probe’s tip. This is crucial for navigating through tight spaces during inspections.
Step 7: Light Source Adjustment
- Industrial videoscopes are equipped with LED lights on the probe to illuminate the inspection area. Adjust the intensity of the light source to obtain clear and well-lit images.
Step 8: Safety Precautions
- Before using the videoscope, review the safety guidelines in the user manual.
- Wear appropriate personal protective equipment (PPE) such as gloves and safety glasses during inspections, especially in hazardous environments.
Step 9: Conducting Test Inspections
- Perform a test inspection in a controlled environment to familiarize yourself with the videoscope’s controls and features.
- Verify that the images and videos captured by the videoscope meet the required quality standards.
Step 10: Proper Storage and Maintenance
- After each use, clean the probe and videoscope unit according to the manufacturer’s instructions.
- Store the industrial videoscope and its accessories in a dry and secure location, protecting them from potential damage.
Conclusion: By following this installation process, you can ensure that your industrial videoscope is ready for efficient and accurate inspections. Regular maintenance and adherence to safety protocols will extend the lifespan of the videoscope and contribute to its optimal performance in various industrial applications.